Random music videos
A tutorial on making random videos using a neural network.
Lately I’ve been generating “ambient jungle” using a script I wrote (sampswap) to probabilistically add effects to audio. The generated music pieces are all composed of random samples with random effects so I thought it’d be relevant to make random music videos.
I found Deep Music Visualizer, that uses the BigGAN neural network, which is great for generating tempo and pitch synced music videos.
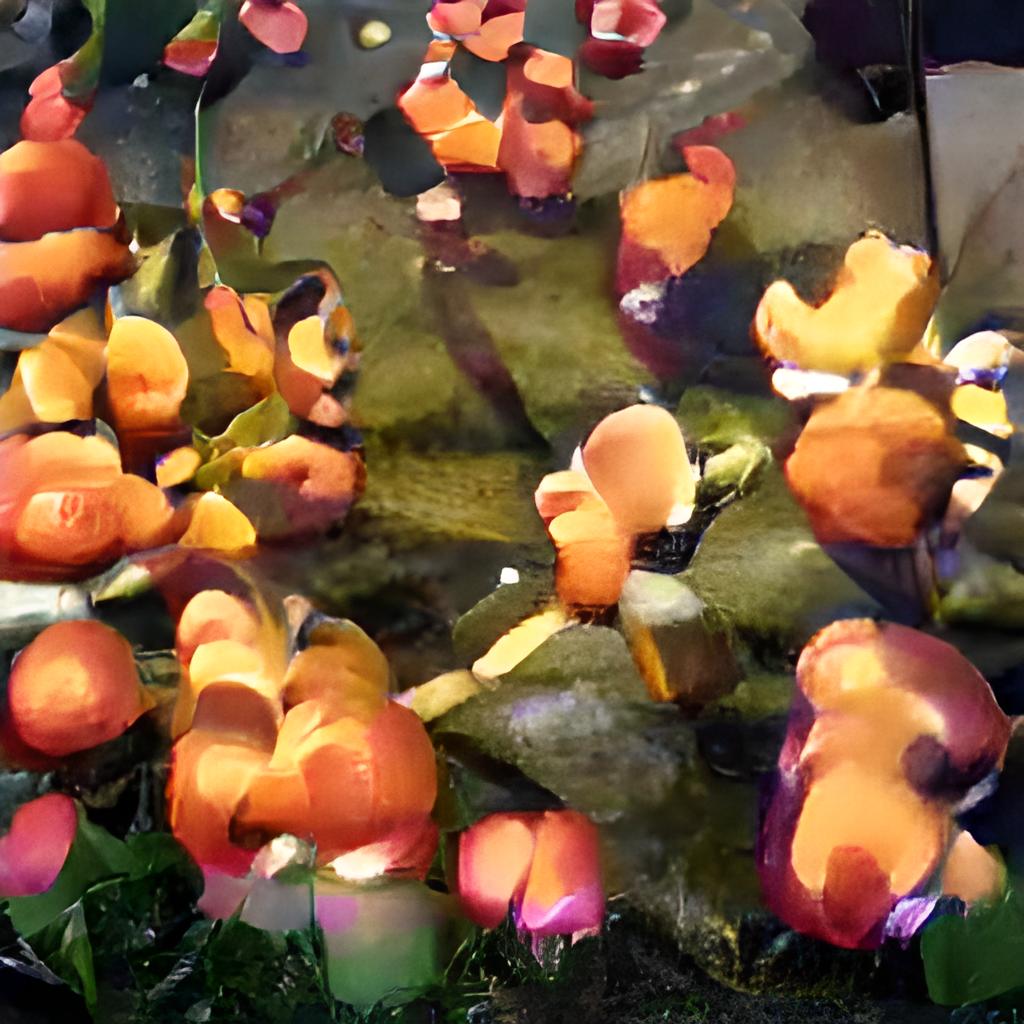
Here’s some example videos with some short snippets of music I generated:
Its actually easy to make this style of video and it can be done for free! You also don’t need to download any software to do it - it can all be done in the browser. Here’s the tutorial on how to make your own deep AI music videos with your own music.
7 steps to make deep dream music videos
1. Get a audio file
This will probably work best with music, but any audio file will do. Make sure it is a mp3 though, and rename the audio to “1.mp3”. This is important.
(Its possible to use files with different names but if you have a different name you have to change some things further down but its more complicated).
2. Download a colab notebook
Now use this link to download the “notebook”: deep_dreams_music_video.ipynb. Click the “Download ZIP” button on that page to download it. Unzip the archive and note where it is on the computer. We will use the file in the next step.
3. Setup Google Colab
We are going to use Google’s “Colab notebooks” to generate the videos. This will allow you to generate the videos without having to install anything (and the video generation is fast because you can use Google’s GPU). And its free.
You have to have a Google account for this. Once you do, goto colab.research.google.com. Once you are on that page you might be greeted by a box such as below - if not in the upper left-hand corner you can click “File” and then “Open”. Then you should see this box:
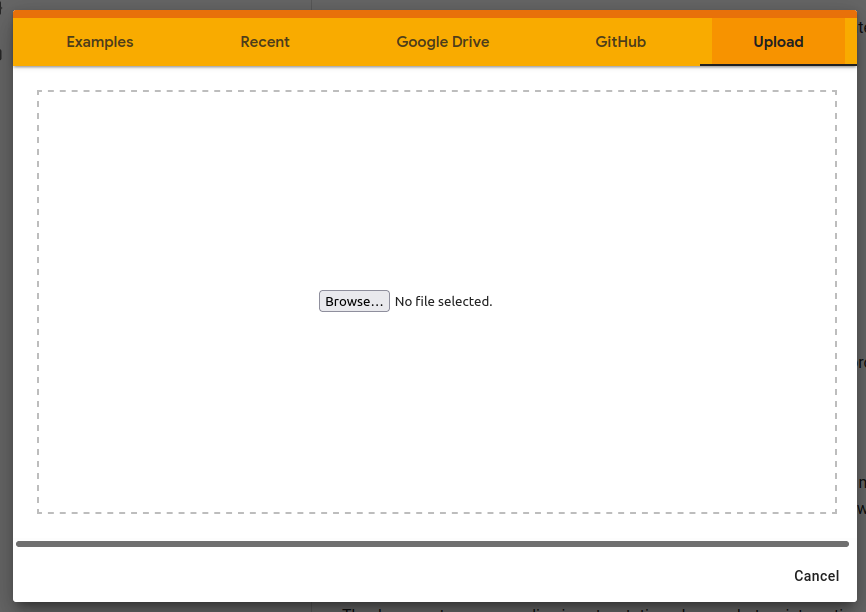
You’ll need to click the tab that says “Upload”. Now you go ahead and hit “Browse…” and select the file you downloaded and unzipped in the last step. Now you should have it loaded in your window!
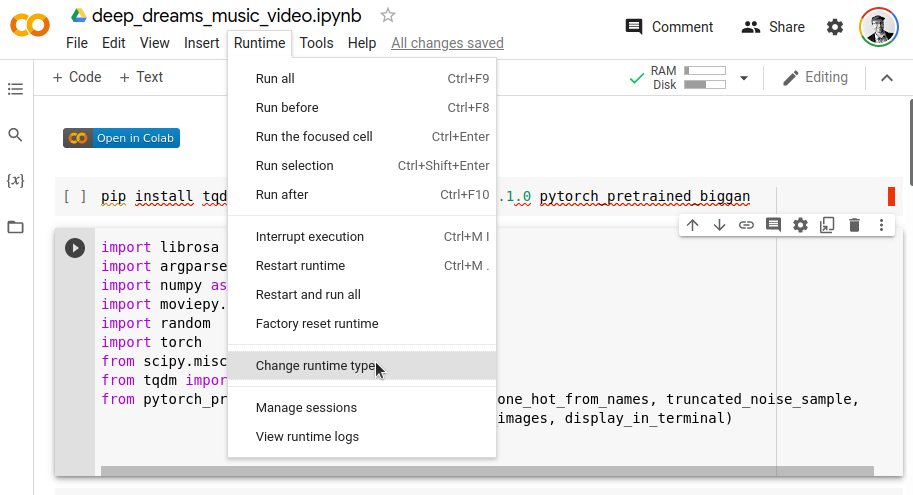
4. Change runtime
The default runtime processor is CPU, we need to use GPUs. Click “Runtime” and click “Runtime Type” and then select “GPU” where it says “Hardware accelerator”. Then hit “Save”.
5. Load the notebook
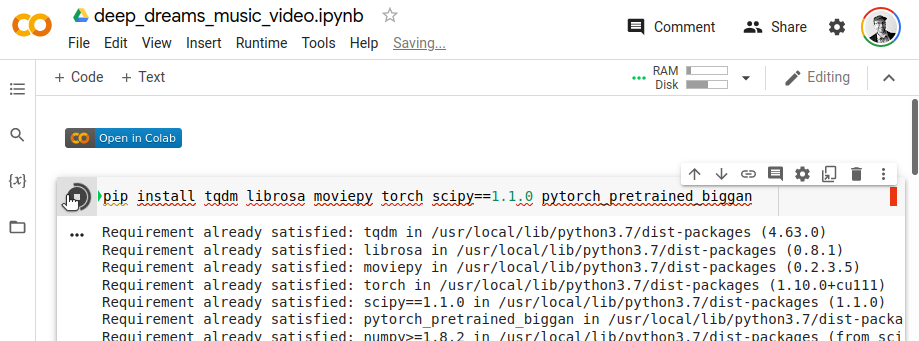
Now we can load the notebook. You can run each section of the notebook, one at a time, in sequence. Start with the first two sections.
6. Upload your music
Now we should be at the third “cell” of the notebook. Run it like you did in the last two steps. After you run it, a little button will appear that you can use to upload your music.
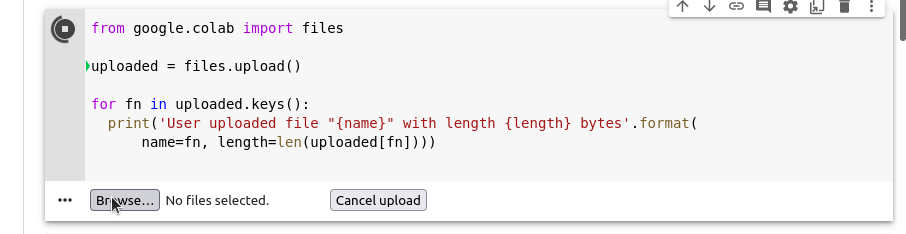
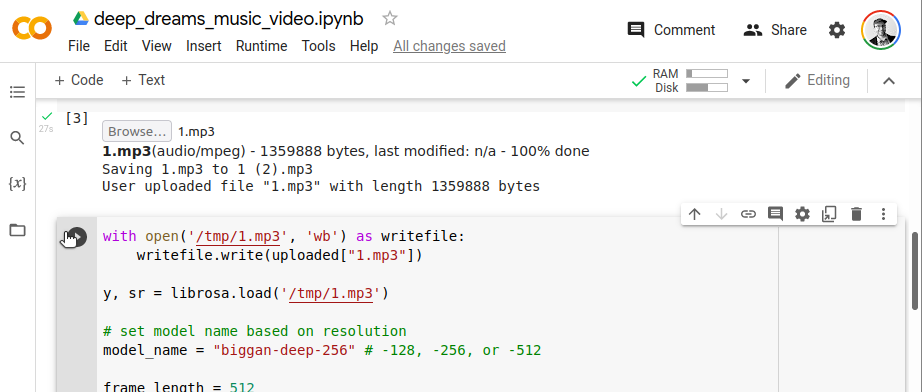
This button says “Browse” and you can click on it and upload your music file “1.mp3”. Wait a few seconds for it to upload.
7. Generate a music video!
Now the final part is to run the last cell of the notebook by clicking play. It will use the music file you uploaded to generate a random music video. Once its down it will be downloaded to your computer. This might take a few minutes, depending on the size of the file.
You can do this step as many times as you want - it will generate a new random video each time. You don’t need to run all the other cells if you want to make a new one either! Just run this last cell and wait a few minutes for the new video to download to your computer.
8. (optional) Modify the kinds of images
You can change the types of images shown, to an extent. This is totally optional - by default the classes of images will be random. But you can edit one line of code to try to steer the randomness by allowing only certain classes of images.
First, check out this list of available image classes. Each one has a number, and you need to write down the numbers of the classes you want. For example, if I wanted “hen” and “vulture” type images I would write down “8” and “23”.
Then change one line of code in the last cell. Instead of
1cls1000 = list(range(1000))
change it to this:
1cls1000 = [8,23]*12
I used “8” and “23” because I wanted hens and vulture type classes. But you could do any numbers you want, and choose between 2 and 12 numbers. Keep the *12 there otherwise it won’t have enough classes to compute. Try generating with that and you should get images that revolve mostly around those selected classes.
Enjoy
If you have any questions, feel free to reach out to me through Instagram or through my website. If you enjoy my music, check out the rest of my music on Bandcamp. If you enjoy my coding projects, consider becoming a sponsor.