miti
Use a headless Raspberry Pi to sequence multiple electronic instruments.
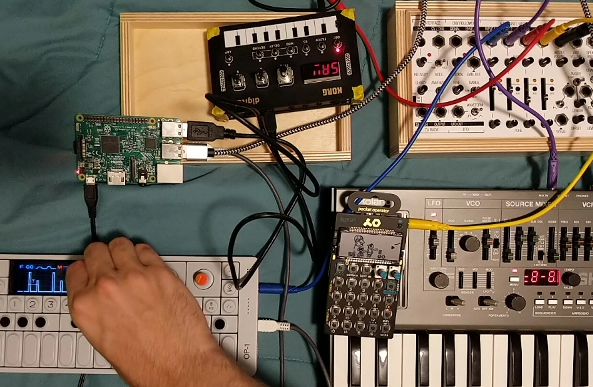
Lately, I’ve been making music using synthesizers. Rather than use an audio program like Garageband or Ableton, I like to make music by “performing” the song in real-time. I am able to perform on more than one synthesizer by using “sequencing”, a feature common to modern synthesizers that let you preset how the notes should play.
Instead of writing sequences into each synthesizer individually, I wanted to use a Raspberry Pi as a single sequencer that can play all synthesizers at once.
To do this, I wrote MIDI software that enables sequencing of multiple instruments simultaneously, with any number of parts and patterns. I call this software, miti, because it is MIDI but with text (miti = musical instrument textual interface). It is optimized to work on Raspberry Pi’s.
This is a quick tutorial on how to get your Raspberry Pi started with sequencing.
To get more information about the code, see my blog post, or the miti documentation.
Example of sequencing synthesizers with a Raspberry Pi
Here is a bit of a song I’m playing using miti on a Raspberry Pi to control three synthesizers simultaneously.
Tutorial for using miti
First install portmidi, a GCC compiler, and git on your Raspberry Pi:
> sudo apt-get install libportmidi-dev libportmidi0 gcc git
Next, install Go:
> wget https://golang.org/dl/go1.14.6.linux-armv6l.tar.gz
> sudo tar -C /usr/local -xzf go1.14.6.linux-armv6l.tar.gz
> source ~/.profile
> rm go1.14.6.linux-armv6l.tar.gz
Edit your .profile or .zshrc file to add new environmental variables:
export PATH=$PATH:/usr/local/go/bin:$HOME/go/bin
export GOPATH=$HOME/go
Be sure to source the file you edited after editing:
> source ~/.profile
Finally, install miti:
> git clone https://github.com/schollz/miti
> cd miti
> go install -v
That’s it! Now you can run miti:
> miti
You can plug in any number of devices into the Raspberry Pi and they will show up when you use that command. You can then create a .miti file and start sequencing. For more information, see the documentation.
