Running norns without the shield
Instructions for using a Raspberry Pi to run the norns sound system.
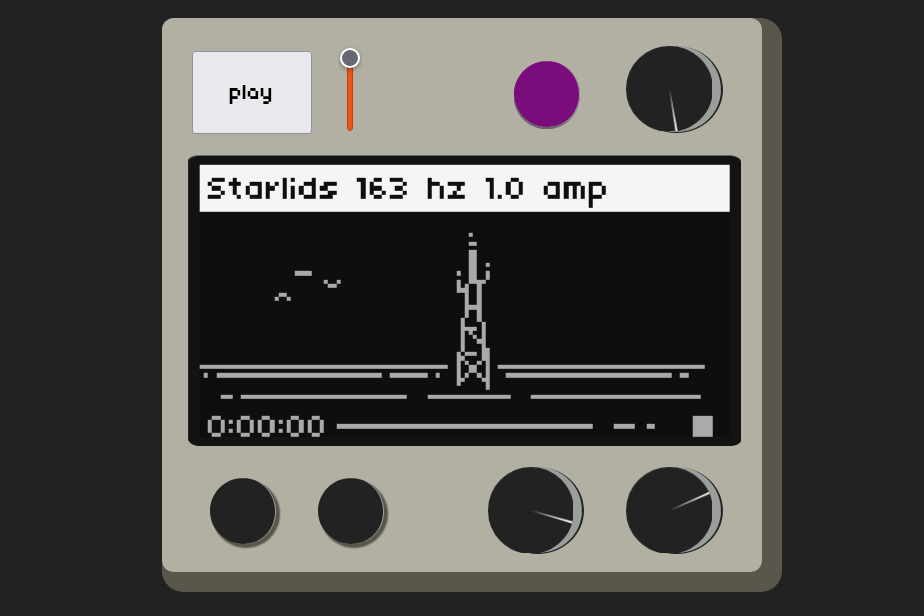
norns is a sound computer released by monome.org that lets you use lua to write simple scripts that interface with SuperCollider, softcut, and cairo-drawing utilities. Here are some of the things I’ve made with norns.
Normally norns comes packaged as a standalone device or as a shield for a Raspberry Pi. However it is possible to utilize it without a physical hardware, and just run on a regular headless Raspberry Pi without the shield.
Expectations
Running norns on a headless pi without the shield misses out on several things without the physical device. Keep this in mind:
The physical device uses buttons and encoders and a screen. The system described below uses a web browser as a screen and uses your mouse to interact with the virtual buttons/encoders, which pales in comparison to the physical implementation (but works nonetheless).
The physical norns device easily interfaces with midi gear. The system described below does not (although in theory it could with Web Midi but I’m not interested in implementing that).
The physical norns device has low latency and high-quality audio. Depending on the USB audio device you get you would also have low latency and high-quality (24-bit, low noise) but it will depend on your device.
Installation on a Docker-enabled computer
Currently these instructions only work if you have an amd64 processor. If you have a Raspberry Pi, you’ll need to skip to the next instructions.
If you want to install this on a computer that runs Docker (Linux server or something), then the instructions are much simpler. You can simply clone the main directory and build the docker image:
git clone https://github.com/schollz/norns-desktop
./run_docker.sh
This will automatically start norns with an internet radio as well. If you want to use on-board audio you need to edit jackdr from the following:
/usr/bin/jackd -R -P 95 -d dummy -r 48000 -p 128
to something that uses your audio (e.g. audio device 0):
/usr/bin/jackd -R -P 95 -d alsa -d hw:0
And then run run_docker.sh again.
Open <your pi IP address>:8889 to see your norns and interact with it. Open <your pi IP address>:5000 to use maiden to install scripts and edit things and restart the system.
Installation on a Raspberry Pi (full instructions)
Pre-requisites
- Raspberry Pi with 64-bit OS installed
- 2x2 USB interface (like this one for $10)
Install libraries
DEBIAN_FRONTEND=noninteractive sudo apt-get install -y \
  libncursesw5-dev sox git libicu-dev libudev-dev \
  libncurses5-dev libssl-dev  apt-transport-https  dbus \
  apt-utils  ca-certificates  gnupg2  build-essential  bzip2  \
  cmake  curl  gdb  ladspalist  libasound2-dev  \
  libavahi-client-dev  libavahi-compat-libdnssd-dev  \
  libcwiid-dev  libcairo2-dev  libevdev-dev  libfftw3-dev \
  libicu-dev  liblo-dev  liblua5.1-dev  liblua5.3-dev  \
  libreadline6-dev  libxt-dev  luarocks  pkg-config  \
  python-dev  unzip  wget cdbs  libboost-program-options-dev \
  make gcc g++ libmad0-dev  libid3tag0-dev libsndfile1-dev \
  libgd-dev libboost-filesystem-dev libboost-regex-dev \
  python3-pip python3-setuptools python3-wheel vim \
  libboost-dev libsdl2-dev x11vnc xvfb x11-apps imagemagick \
  icecast2 lame espeak ffmpeg vorbis-tools darkice
Install audiowaveform
git clone https://github.com/bbc/audiowaveform.git /tmp/audiowaveform && \
    mkdir -p /tmp/audiowaveform/build && \
    cd /tmp/audiowaveform/build && \
    cmake -D ENABLE_TESTS=0 .. && make && sudo make install && \
    audiowaveform --help
Install aubio tools
git clone https://git.aubio.org/aubio/aubio /tmp/aubio && cd /tmp/aubio && \
    make && cd /tmp/aubio && sudo ./waf install --destdir=/ && sudo ldconfig && \
    cd / && rm -rf /tmp/aubio && aubioonset --help
Install Go
For 64-bit Raspberry Pi:
wget https://go.dev/dl/go1.19.2.linux-arm64.tar.gz -O /tmp/go.tar.gz && \
    sudo tar -C /usr/local -xzvf /tmp/go.tar.gz && \
    rm -r /tmp/go.tar.gz && \
    /usr/local/go/bin/go version
install ldoc
sudo luarocks install ldoc
install jack2
First install the distro-version to get the folders created.
sudo apt install jack
Then install a later version known to work v1.9.19:
export JACK2_VERSION=1.9.19 && mkdir -p /tmp/jack2 && \
    wget https://github.com/jackaudio/jack2/archive/v$JACK2_VERSION.tar.gz -O /tmp/jack2/jack2.tar.gz && \
    cd /tmp/jack2 && \
    tar xvfz jack2.tar.gz && \
    cd /tmp/jack2/jack2-$JACK2_VERSION && \
    ./waf configure --classic --alsa=yes --firewire=no --iio=no --portaudio=no --prefix /usr && \
    ./waf && sudo ./waf install && cd / && rm -rf /tmp/jack2 && sudo ldconfig
Install SuperCollider
export SUPERCOLLIDER_VERSION=3.12.2 &&  mkdir -p /tmp/supercollider && cd /tmp/supercollider && \
    wget https://github.com/supercollider/supercollider/releases/download/Version-$SUPERCOLLIDER_VERSION/SuperCollider-$SUPERCOLLIDER_VERSION-Source.tar.bz2 -O sc.tar.bz2 && \
    tar xvf sc.tar.bz2 && cd /tmp/supercollider/SuperCollider-$SUPERCOLLIDER_VERSION-Source && \
    mkdir -p build && cd /tmp/supercollider/SuperCollider-$SUPERCOLLIDER_VERSION-Source/build && \
    cmake -DCMAKE_BUILD_TYPE="Release" \
          -DCMAKE_INSTALL_PREFIX=/usr/local \
          -DBUILD_TESTING=OFF \
          -DENABLE_TESTSUITE=OFF \
          -DNATIVE=OFF \
          -DINSTALL_HELP=OFF \
          -DSC_IDE=OFF \
          -DSC_QT=OFF \
          -DSC_ED=OFF \
          -DSC_EL=OFF \
          -DSUPERNOVA=OFF \
          -DSC_VIM=OFF \
          .. && \
    make -j1 && sudo make install && cd /
While that is installing, you can also install the plugins:
export SUPERCOLLIDER_VERSION=3.12.2 &&  SUPERCOLLIDER_PLUGINS_VERSION=3.11.1 && \
    mkdir -p /tmp/sc3-plugins && cd /tmp/sc3-plugins && \
    git clone --depth=1 --recursive --branch Version-$SUPERCOLLIDER_PLUGINS_VERSION https://github.com/supercollider/sc3-plugins.git && \
    cd /tmp/sc3-plugins/sc3-plugins && mkdir -p build && \
    cd /tmp/sc3-plugins/sc3-plugins/build && \
    cmake -DSC_PATH=/tmp/supercollider/SuperCollider-$SUPERCOLLIDER_VERSION-Source \
          -DNATIVE=OFF \
          .. && \
    cmake --build . --config Release -- -j1 && \
    sudo cmake --build . --config Release --target install && \
    cd / && rm -rf /tmp/sc3-plugins && sudo ldconfig
Install nanomsg
export NANOMSG_VERSION=1.1.5 && mkdir -p /tmp/nanomsg && cd /tmp/nanomsg && \
    wget https://github.com/nanomsg/nanomsg/archive/$NANOMSG_VERSION.tar.gz -O nanomsg.tar.gz && \
    tar -xvzf nanomsg.tar.gz && cd /tmp/nanomsg/nanomsg-$NANOMSG_VERSION && \
    mkdir -p /tmp/nanomsg/nanomsg-$NANOMSG_VERSION/build && \
    cd /tmp/nanomsg/nanomsg-$NANOMSG_VERSION/build && \
    cmake .. && cmake --build . && sudo cmake --build . --target install && \
    cd / && rm -rf /tmp/nanomsg && sudo ldconfig
Install libmonome
export LIBMONOME_VERSION=1.4.4 && cd /tmp/ && wget https://github.com/monome/libmonome/archive/v$LIBMONOME_VERSION.tar.gz -O libmonome.tar.gz && \
    tar -xvzf libmonome.tar.gz && cd /tmp/libmonome-$LIBMONOME_VERSION && \
    ./waf configure --disable-udev --disable-osc && \
    ./waf && sudo ./waf install && \
    cd / && rm -rf /tmp/libmonome-$LIBMONOME_VERSION && sudo ldconfig
Create credentials
Edit the /etc/security/limits.conf file and add these two lines:
@audio   -  rtprio     95
@audio   -  memlock    unlimited
Now lets create the we user:
sudo useradd -g audio we -m -s /bin/bash
sudo usermod -aG video we
sudo adduser we sudo
sudo mkhomedir_helper we
Make sure to add we to the sudoers:
sudo visudo
# add
we ALL=(ALL) NOPASSWD: ALL
Add a password for we:
sudo passwd we
Very important now to log in as we:
su we
cd ~
Install oh-my-zsh
Now you should always be logged in as we!
This makes things easier.
ZSH=/home/we/.oh-my-zsh sh -c "$(curl -fsSL https://raw.github.com/ohmyzsh/ohmyzsh/master/tools/install.sh)"
curl https://raw.githubusercontent.com/schollz/dotfiles/master/.zshrc > ~/.zshrc
source ~/.zshrc
Install node
(You should be logged in as we).
For 64-bit Raspberry pi:
cd /tmp/ && wget https://nodejs.org/dist/v16.17.1/node-v16.17.1-linux-arm64.tar.xz -O /tmp/node.tar.xz && \
  mkdir -p /home/we/node && tar -xJf /tmp/node.tar.xz -C /home/we/node && \
  mv /home/we/node/node-*/* /home/we/node/ && \
  mkdir -p /home/we/node/node_modules && \
  npm config set prefix "/home/we/node/node_modules" && \
  npm install -g npm yarn && npm -v && node -v
Install maiden
(You should be logged in as we).
This step uses a specially patched version of maiden that doesn’t use dbus.
export MAIDEN_TAG=ce4471e25a45c87040817c0619f3596fa43060aa &&
    export MAIDEN_REPO=https://github.com/schollz/maiden.git && git clone $MAIDEN_REPO maiden_src && \
     cd maiden_src && \
     git checkout $MAIDEN_TAG && \
     make release-local && \
     tar -xvf dist/maiden.tgz -C /home/we && \
     /home/we/maiden/project-setup.sh
Install matron
(You should be logged in as we).
At this step you might need a little more than 1G of ram to compile. Create a small swpa in case you haven’t to make sure it compiles fine:
sudo fallocate -l 1G /swapfile
sudo chmod 600 /swapfile
sudo mkswap /swapfile
sudo swapon /swapfile
Now you can build norns:
export NORNS_TAG=2faa96bd763b69e4b840adc4e2ee8e58e00522f0 && \
  export NORNS_REPO=https://github.com/monome/norns.git && \
  cd /home/we/ && git clone $NORNS_REPO &&  cd /home/we/norns && \
  git checkout $NORNS_TAG &&  git submodule update --init --recursive && \
  ./waf configure --desktop && ./waf build --desktop
Once installed, the norns source needs to be patched:
sed -i 's/norns.disk/100000/g' /home/we/norns/lua/core/menu/tape.lua
sed -i 's/screensaver.time = 900/screensaver.time = 90000000/g' /home/we/norns/lua/core/screen.lua
Also you need to a copy a file to the SuperCollider extensions:
mkdir -p ~/.local/share/SuperCollider/Extensions
cp /home/we/norns/sc/norns-config.sc ~/.local/share/SuperCollider/Extensions/
Install startup files
(You should be logged in as we).
cd /home/we && git clone https://github.com/schollz/norns-desktop && \
    cd /home/we/norns-desktop && chmod +x *sh && \
    cp restart_* /home/we/norns/ && \
    cp /home/we/norns-desktop/matronrc.lua /home/we/norns/ && \
    go build -v -x
Setup the main directories and add some scripts:
mkdir -p ~/dust/data && mkdir -p ~/dust/audio && \
    mkdir -p ~/dust/code && cd /home/we/dust/code && \
    git clone https://github.com/tehn/awake && \
    git clone https://github.com/northern-information/dronecaster && \
    git clone https://github.com/schollz/l_ll__l_
Run norns!
(You should be logged in as we).
You can run norns in the full-mode (with playback and recording) only if you have a 2x2 USB audio interface. Otherwise you need to run in playback mode only.
By default the script is for playback mode, only:
/home/we/norns-desktop/start_norns_pi.sh
If you want to use a 2x2 USB audio interface, you need to change start_norns_pi.sh and uncomment the line that says 2x2 USB interface and comment the line that says playback only.
Open <your pi IP address>:8889 to see your norns and interact with it. Open <your pi IP address>:5000 to use maiden to install scripts and edit things and restart the system.
Troubleshooting
tinker / #Music #Portfolio #Norns
← One-line drawings Emulating a JP-8000 supersaw in SuperCollider→